Complete guide to deploying your Express.js App on Vercel using GitHub Actions
How to Deploy Express REST API on Vercel
Software Developer
Express.js is used with Node.js as a server framework for building Rest APIs. It can be nauseating at times looking for the right place to deploy your APIs for free, maybe for a side project or some other stuff, and it scales. Vercel takes care of that seamlessly. In this guide, we will also look at how you can use GitHub actions to deploy your REST API easily.
Setting up your Project
Create and set up a new project.
You can start by creating a new project from your terminal or command line. Navigate to the folder you would like to create your express app, and enter the following commands;
 mkdir express-vercel-app
 cd express-vercel-app
 npm init -y
The command above will create a new project directory for your app, and a
package.jsonfile containing default configurations for running the app.Proceed with adding express.js and other packages your project would require. You can install express using
npm install expressOnce you are done with setting up your app, you should have an
srcfolder. Proceed to add a directory called/apiand add a new fileindex.ts. If this is a new project, you can decide to use this as the entry point for your app, otherwise, if it is an existing project where you have yourindex.tssetup directly in yoursrcfolder, you can decide to configure yourindex.tsin the/apidirectory like this;// /api/index.ts import app from '../src/index' module.exports = app;Since the
index.tsis already your entry point in your existing app, you can just add an export the app;//index.ts // Import necessary modules and packages import express from 'express'; const app = express(); app.get("/api/v1", (req, res) => { res.send("Express Rest Api"); }); app.listen(8080, () => console.log("Server ready on port 8080.")); export default app;Perhaps you are working on a new project, you can decide to make your
/api/index.tsyour entry point for the app, and the configuration should look like this;// /api/index.ts // Import necessary modules and packages import express from 'express'; const app = express(); app.get("/api/v1", (req, res) => { res.send("Express Rest Api"); }); app.listen(8080, () => console.log("Server ready on port 8080.")); module.exports = app;
Configuring Vercel for your project
The next step to achieving this is configuring Vercel in your application. For people who decide to link their Vercel account to GitHub, they may not necessarily need to do this. I mean, since you can just deploy directly from your Github by giving Vercel access to the repository.
First, we start by creating a token on Vercel. Navigate to the tokens page on your Vercel dashboard settings;

Fill the Token name and Scope fields respectively, and also choose an expiration date. Copy the token you created and proceed to the Actions tab in Secrets and Variables in your GitHub repository settings;
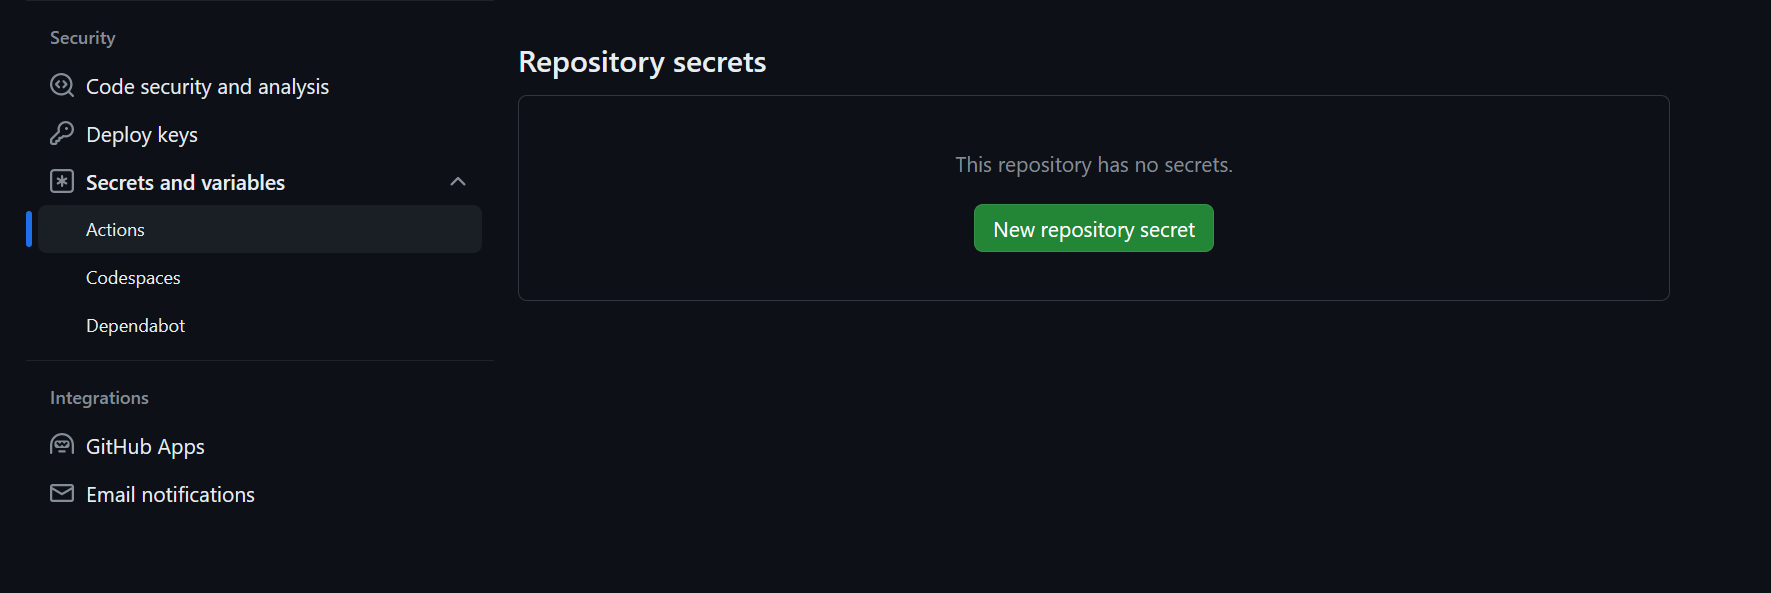
Click on New repository secret and define the values for
YOUR_SECRET_NAMEand Secret value, in this case,Namewill beVERCEL_TOKENand paste the value you copied from the token you created as Secret.We proceed to getting our
VERCEL_PROJECT_IDandVERCEL_ORG_ID. To get this, we can easily create it locally using thevercel cli. Login to your Vercel account from your express project directory using;cd express-vercel-app vercel login or npx vercel loginYou will be prompted to login via your default login mode, select the option that fits your login method, you should get a response if logged in successfully. Next, we create our project using;
vercel linkYou will be asked a few questions, provide the appropriate responses, and modify your settings as you want. Here is an example;

Once this is complete, you should have a
.vercelfolder created in your root directory, where you can find yourprojectIdandorgIdin theproject.json;{"projectId":"prj_*******","orgId":"********CWVBQt"}Back to the GitHub Actions, where you created
VERCEL_TOKENsecrets, you will add two new secrets forVERCEL_PROJECT_IDandVERCEL_ORG_IDand paste the values from yourprojectIdandorgIdas the secrets.To round up this configuration, create a new file
vercel.jsonin your root folder, and add the following content;{ "version": 2, "rewrites": [{ "source": "/(.*)", "destination": "/api" }] }This is simply asking Vercel to route all requests to the
/apifolder we created earlier.
Create and Configure CI/CD pipelines
To configure our CI/CD pipelines, we will first create a folder .github and a sub folder workflows. We will be adding two pipelines, production.yaml and preview.yaml.
Your production.yaml file should look like this;
name: Vercel Production Deployment
env:
  VERCEL_ORG_ID: ${{ secrets.VERCEL_ORG_ID }}
  VERCEL_PROJECT_ID: ${{ secrets.VERCEL_PROJECT_ID }}
on:
  push:
    branches:
      - Master
jobs:
  Deploy-Production:
    runs-on: ubuntu-latest
    steps:
      - uses: actions/checkout@v2
      - name: Install Vercel CLI
        run: npm install --global vercel@latest
      - name: Pull Vercel Environment Information
        run: vercel pull --yes --environment=production --token=${{ secrets.VERCEL_TOKEN }}
      - name: Build Project Artifacts
        run: vercel build --prod --token=${{ secrets.VERCEL_TOKEN }}
      - name: Deploy Project Artifacts to Vercel
        run: vercel deploy --prebuilt --prod --token=${{ secrets.VERCEL_TOKEN }}
And preview.yaml
name: Vercel Preview Deployment
env:
  VERCEL_ORG_ID: ${{ secrets.VERCEL_ORG_ID }}
  VERCEL_PROJECT_ID: ${{ secrets.VERCEL_PROJECT_ID }}
on:
  push:
    branches-ignore:
      - Master
jobs:
  Deploy-Preview:
    runs-on: ubuntu-latest
    steps:
      - uses: actions/checkout@v2
      - name: Install Vercel CLI
        run: npm install --global vercel@latest
      - name: Pull Vercel Environment Information
        run: vercel pull --yes --environment=preview --token=${{ secrets.VERCEL_TOKEN }}
      - name: Build Project Artifacts
        run: vercel build --token=${{ secrets.VERCEL_TOKEN }}
      - name: Deploy Project Artifacts to Vercel
        run: vercel deploy --prebuilt --token=${{ secrets.VERCEL_TOKEN }}
The basic difference between preview and production pipelines is that, the preview pipeline deploys all other branches aside Master, and the production pipeline deploys the Master branch only.
Depending on which testing library you may be using, you can decide to add unit testing to either or both pipelines.
Once you are done with the configurations, you can proceed to push the code to your GitHub and monitor the GitHub actions. The deployment should be successful, if otherwise, try to crosscheck your code and debug accordingly.

